Showing posts with label altered art. Show all posts

Thursday, March 21, 2013

Graphic 45 Design Team 2013 Audition


I have a confession to make! I AM A PAPERHOLIC! There I put it out there.  Since we do not have a locally owned scrapbook store I can't figure out how I have collections after collections and stacks & stacks? I have loved Graphic 45 since the first time I saw one of their collections.  For over 3 years I've been going through family pictures from my great-grandparents, grandparents along with my mom and dad's.  It started with the occasion of my parents 50th anniversary and I've been sorting ever since.  I have enough pictures to make at least a half a dozen Heritage books and I have been trying to hoard past Graphic 45 collections for this purpose.  I love it and think it's perfect for this purpose.  I have some but I'm still searching Ebay now & then for the past collections.  

Then came their last two CHA releases of papers and I knew I had to have a couple of them.  French Country and Secret Garden to be exact along with Little Darlings.  I love flowers and use to garden quite a bit.  I have collected sunflowers and chickens for over 15 years so the French Country is perfect.  We are waiting our 4th grandchild to be born so the Little Darlings is a fun collection to use.  Every time I looked at the G45 blog or other sites and saw these collections being used I had a running list in my head of things I would make with them.  

Now combine that with their 2013 Design Team call and I knew I needed to get busy.  The above picture is the culmination of a week of creating, self doubt, excitement, self doubt, accomplishment, self doubt.  But I threw the self doubt out the window, not an easy job in winter, and am throwing my hat into the proverbial ring.  

I have seven projects I'm going to include in this post with individual pictures of each item.  Bear with me as I couple required several pictures to capture the entire project.

Recipe Album


The first project is my version of a Recipe Album using the French Country collection.  I have one of my grandmothers box of handwritten recipes and I've been wanting to make a heritage album with them.  I also have several empty Cricut cartridge boxes that I have been wanting to alter in some way.  I sanded and took apart the box so I could easily add the paper to all sides.  


I covered all surfaces with papers from the French Country collection and added embellishments.  I then created library pockets to hold the recipe cards since they are written on both front and back.  


I punched two holes in the top of each holder and tied them together with black & white twine just to give it a better presentation (thinking gift idea here).


The picture in the bottom of the box is 4 generations, my great-grandmother, my grandmother (these are her recipes), my mom holding me when I was less than a month old.


Mini Album

The next project is a mini album using the Little Darlings collection and is made for a baby girl.  Our 4th grandchild that is due in June is a girl, this will be one of her mother's presents.  The front has buttons, embellishments from the collection and a tissue paper flower made from tissue paper I received in the mail with a purchase from Ebay.  No I'm not a hoarder but I like to re-purpose things.  


This album has 5 pages that are folded so you have places for pictures, journaling and tags.  I did not create the technique for the pages of the album.  The technique was created by Elsa from justafewdesigns and I discovered it on Pinterest months ago.  
I will show you some of the pages of the album.


The album holds 12 pictures and has 11 journaling tags.  I used the Bind-It-All to put it together.


Altered Canvas


The next item is an 8x8 altered canvas board using the Secret Garden collection.  I used pages from an old gardening dictionary and Mod Podge to cover the base of this.  I then added color using glimmer mists.  The large flower is made from coffee filters that I sprayed with glimmer mist also.  

If you haven't noticed by now I like to alter items.  I'm always on the look out for something I can upcycle too.


Wall Hanging


The next project is also made with the French Country collection.  I used 3 of the cheap chipboard coasters that come in a pack of six from Michaels.  Since they were glossy I sanded each one to give it the tooth to hold the paper.  I used a variety of embellishments and some bling.  The flower is made from a sewing pattern tissue paper. It is one of my favorite techniques.  I used jute twine to anchor them together and to make a simple hanger.  This is destined for my kitchen.


12x12 Scrapbook Page


This page is made with the Little Darlings collection and a variety of embellishments from the collection, buttons, tattered rose ribbon and butterflies.

Sympathy Card

I have a group of friends that try to get together monthly for a crop.  We work on pages and make cards sometimes too.  At the last crop some of the gals requested making sympathy cards so they could have them on hand.  The sentiment stamp is a set from Close to My Heart.  I used the Secret Garden collection to create this card.


4x6 Tag


The last item is a tag I made for a tag exchange a few months ago.  I was in a very pink mood that day for this card.  

Well that is my submission for this design team challenge.  I am going to be anxiously awaiting the results and if you'd like to follow Graphic 45 here is the link to their Blog.  They will be announcing the first round finalists on April the 4th.  Wish me luck and say a little prayer please.  


Thursday, January 12, 2012

Organizing, the rest of the Studio!

To finish up the tour of my studio I wanted to share the final side of the room.  This side houses my desk, an old printer stand, above that is a 2x4 piece of pegboard that holds a ton of items and the area behind my sewing machine.
This is my desktop with my basic tools at hand.  On the right is the Lazy Susan that was featured on Julie's blog on Wednesday.  To the left is a stack of cake stands that house stickles, distress inks, reinkers and chalks.  My desk itself is an old computer desk that I have re-purposed.
 This is my cake stands up close, on the top is a compote to hold the chalks.  This is easy to turn to reach all the items on it.
This is the pegboard my husband made, with the baskets and pegs it holds a lot of items.  Below that is the printer stand that houses my pens, ink pads, hot glue sticks, craft sticks and other miscellaneous items.
This is beside the printer stand, it is a cart from Office Depot.  It holds paper scraps sorted by color families and the top drawer holds various tools, like brayers, wire cutters and anything I can fit in it.  LOL
Beside my pegboard I have just put nails in the wall to hang all of my clear rulers for quilting.  It is directly behind my chair at the sewing machine so they're easy to reach.
This is the continued view with my little inspiration wall above my pressing area.
Another cart from Office Depot, this one has a filing drawer in the bottom, a drawer that holds my circle cutting items and my paper trimmers sit on top.
This is an up to date shot of the wire shelves.  I have used these 3 drawer storage containers that hold all my 8.5x11 Stampin UP! cardstock.  I have labeled each drawer, they each hold at least 3 different colors.  On top of them are baskets that hold Stampin' UP! ribbon rolls, punches and stamp pads.

Well that wraps up the full tour of my studio.  I hope I have given you some new ideas for storage in your studio or craft room.  As Julie said on her blog, organizing your area is an on going process or it should be.  As you add new products to use or purge items that you no longer need or want, your area will be evolving all the time.

I would like to invite you to join a Yahoo group that I enjoy, it is dedicated to your scrapbook room:
http://groups.yahoo.com/group/scrapbookingrooms/

If you are interested in Stampin' UP! products I have a website that you can order from:
http://pamfairchild.stampinup.net

If you have any questions please send me a direct message at:
pamfairstampin@sbcglobal.net
Thanks for stopping by!
Pam 

Wednesday, May 4, 2011

50th Anniversary Memory box


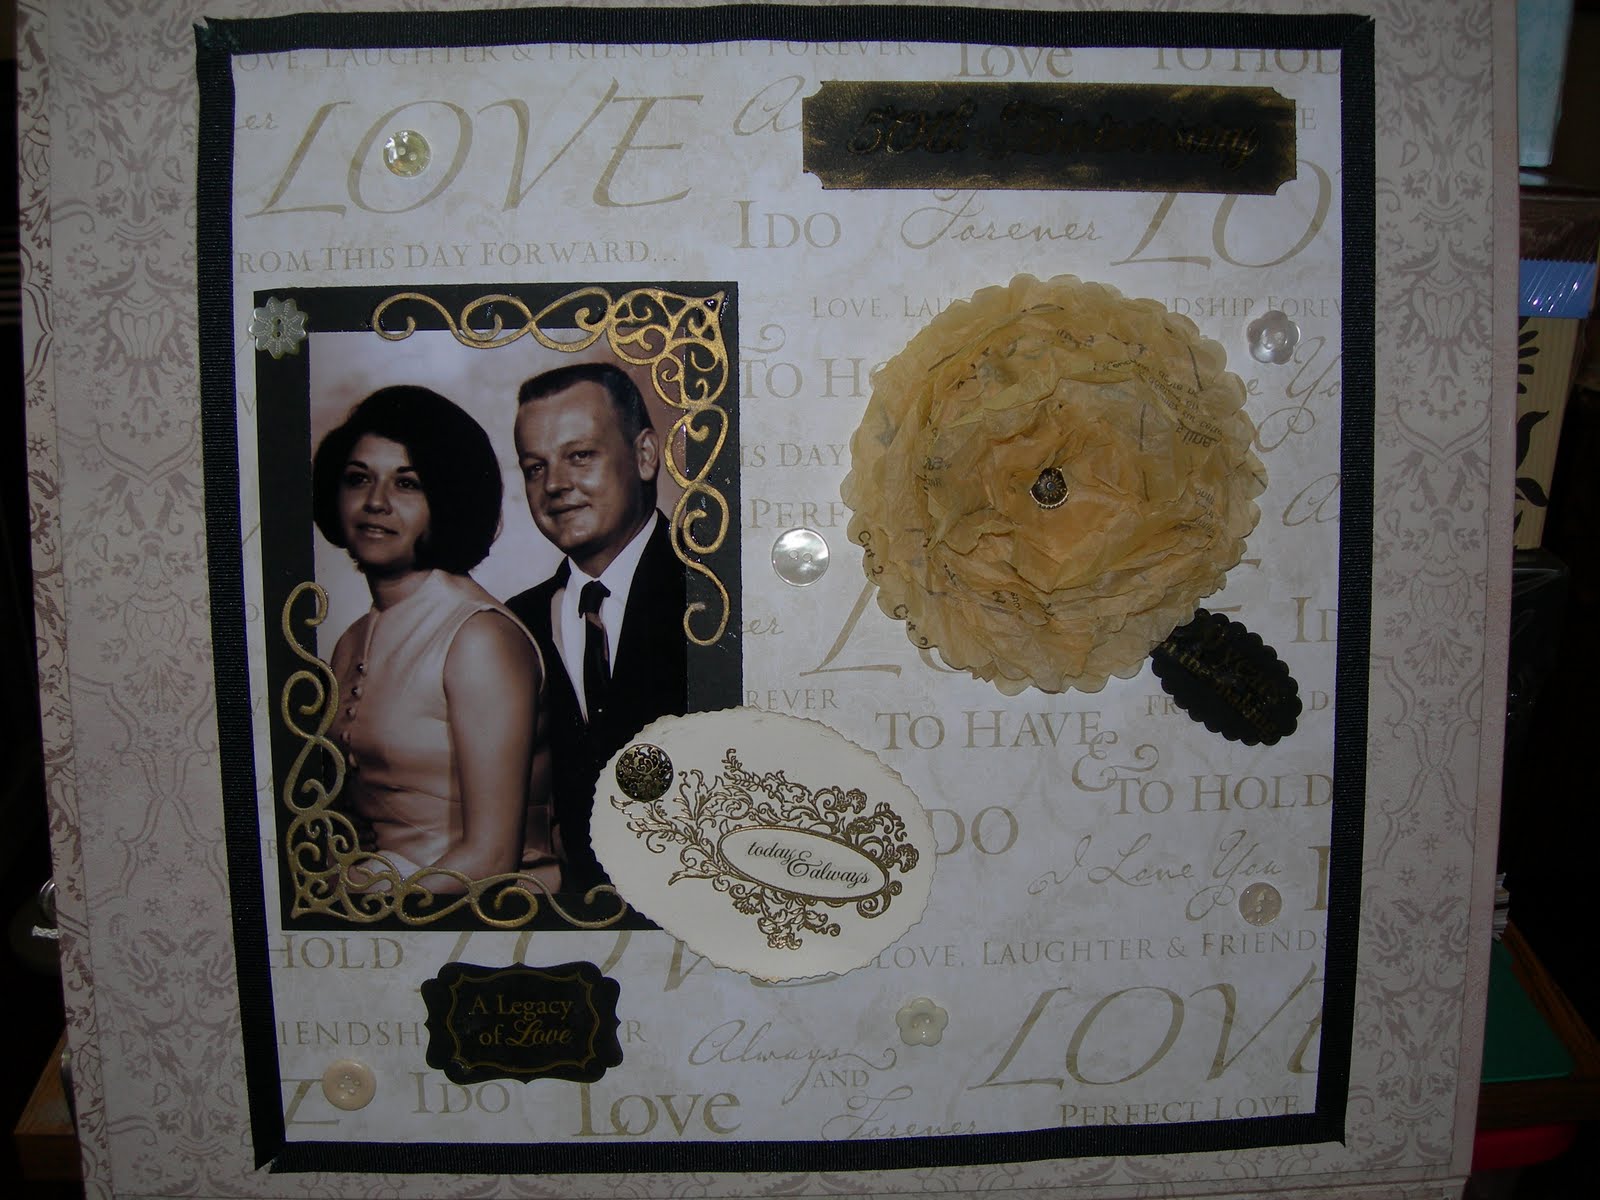
We celebrated my in-laws 50th anniversary on April 9th, 2011 in Green Bay, Wisconsin.  My sisters-in-law, Kelly and Kim did a fantastic job putting this celebration together, from the venue to the video, no detail was missed.  My husband & I being over 650 miles away, were not able to help with this but we wanted to add something special to mom & dad's memories of the night.  I seem to do better on a deadline, not always procrastination, I just could not figure out WHAT to do.  Of course the week before we were to leave I finally figured out a box to hold all their cards and items from the party would be a good thing.  I spent 2 days looking for a box to alter, I knew what I wanted but was having a hard time finding it.  I wanted to alter the outside and inside of the lid to make this special for them.  I finally find this box at JoAnn's.  It was hiding behind a post.  I had taken 15 minutes to debate with myself what size I wanted when I spotted this single box, seriously, behind the structural post of the store.  It was the only one of it's kind and it fit the occasion perfectly.  So now that I did not have to alter the outside I wanted to really make the inside special.  My sister-in-law Kim emailed me several pictures of mom & dad over the years for me to pick from.  This picture was in color but I wanted it sepia toned so it would coordinate with the box and page.

I used a 12x12 sheet with words on it, clear stickers, gold rubbed chipboard, SU stamp frame, SU brads and a tissue paper flower I made out of pieces of an old sewing pattern.  Found the idea for the flower on Marah Johnson's YouTube channel, she is an amazing artist.
http://www.youtube.com/user/TheMarahjohnson
Take a look at all the video instructions she's added in less than 2 months.  Great ideas!

I hope you enjoy seeing the memory box, my in-laws fell in love with it and it is located in their living room so they can share all the memories of that great celebration with anyone who visits.